Showing posts with label paint. Show all posts

Saturday, April 21, 2012

Busy, busy.

Wow! It has been a bit, hasn't it? Well, I've been thiiiiiis close to posting this last week, but you know, things happen...I've been doing a lot in the last week, including searching for a car - which, by the way, could probably be used as a form of torture. UGH!

I did make a dress between now and my last post! I've been putting off writing about it though, because I wanted to get THE perfect picture of it. Something perfectly clear with a crisp white background? Eh, yeahhh...no. Not happening anytime soon! Here's a picture I took right after I finished it:


(That shirt underneath is just what I had on at the moment, I just needed something under there, heh :P)

Yesterday, my boyfriend, my sister, and I went up to my new room and painted it! Yea! Here's a picture of before...


And you'll just have to wait to see the after :)

Don't you love that carpet? :D and those windows are pretty funky too, eh?

More pictures to come. Also to come:

- Tip on hemming stretch knits

- Button bracelet giveaway!

- 10 minute headband tutorial

- Yarn-chandelier-with-bouncy-ball tutorial
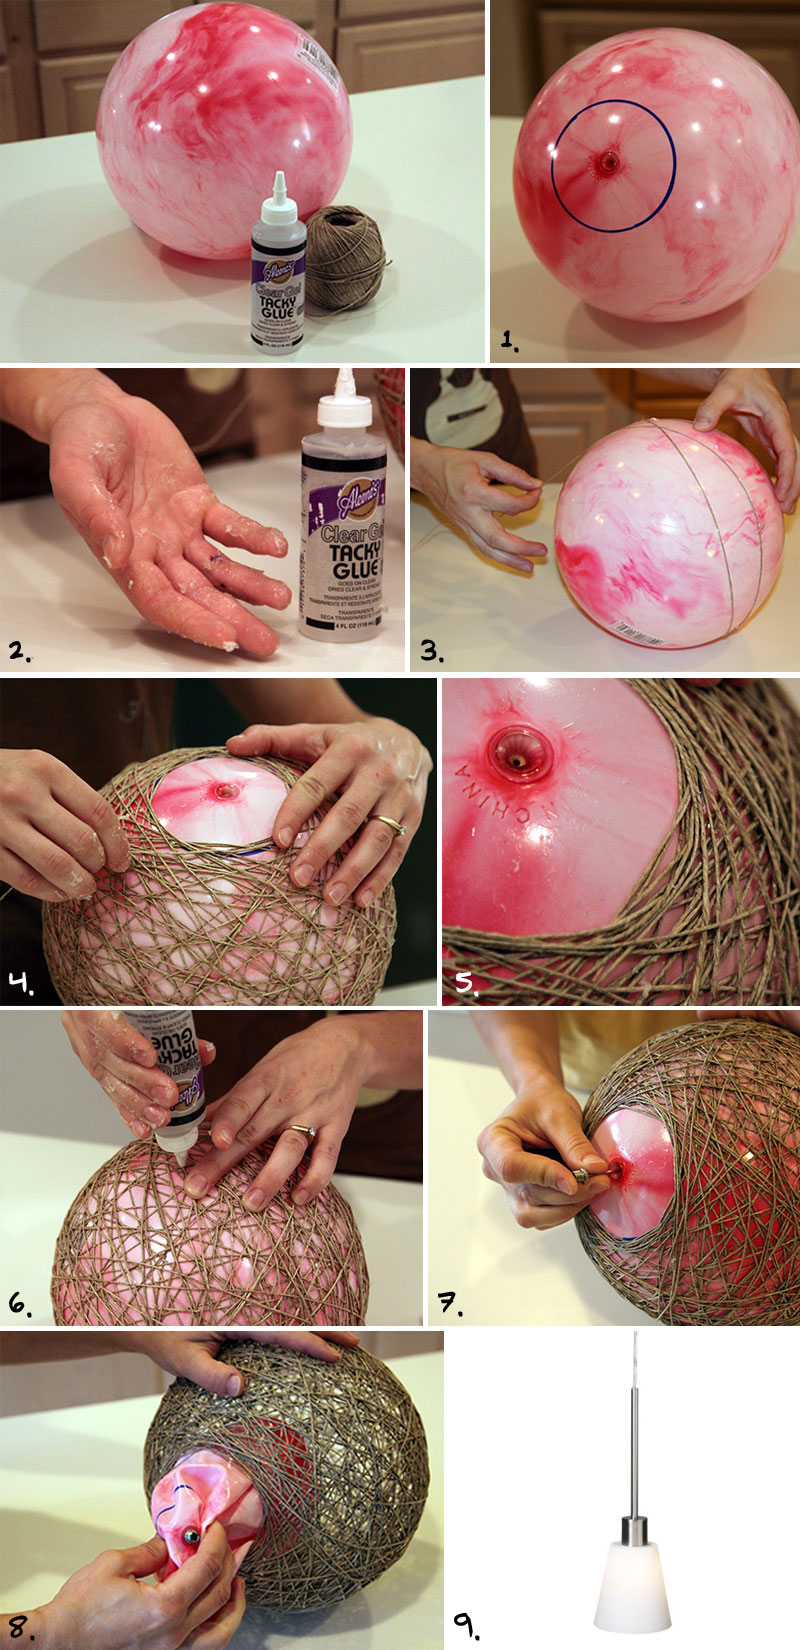

I'm doing this today! Can't wait!

Buhbye <3


Read More......

Pin It!

Sunday, April 1, 2012

RED.

It's Sunday! What a lovely day for a craft. My particular craft today involved a wonderful amount of RED

Since I'm moving out and going to be cooking for myself, I figured I should start growing myself some herbs. I looooove fresh herbs! They make food come alive! So, my mom and I got some seed packets the other day - thyme, chives, rosemary, cilantro, dill, and some lavender (ees for fun). I'll also be stealing a bit of my mom's basil and oregano plants. I sure hope I have her green thumb, there are a lot of little plant lives resting on my shoulders!

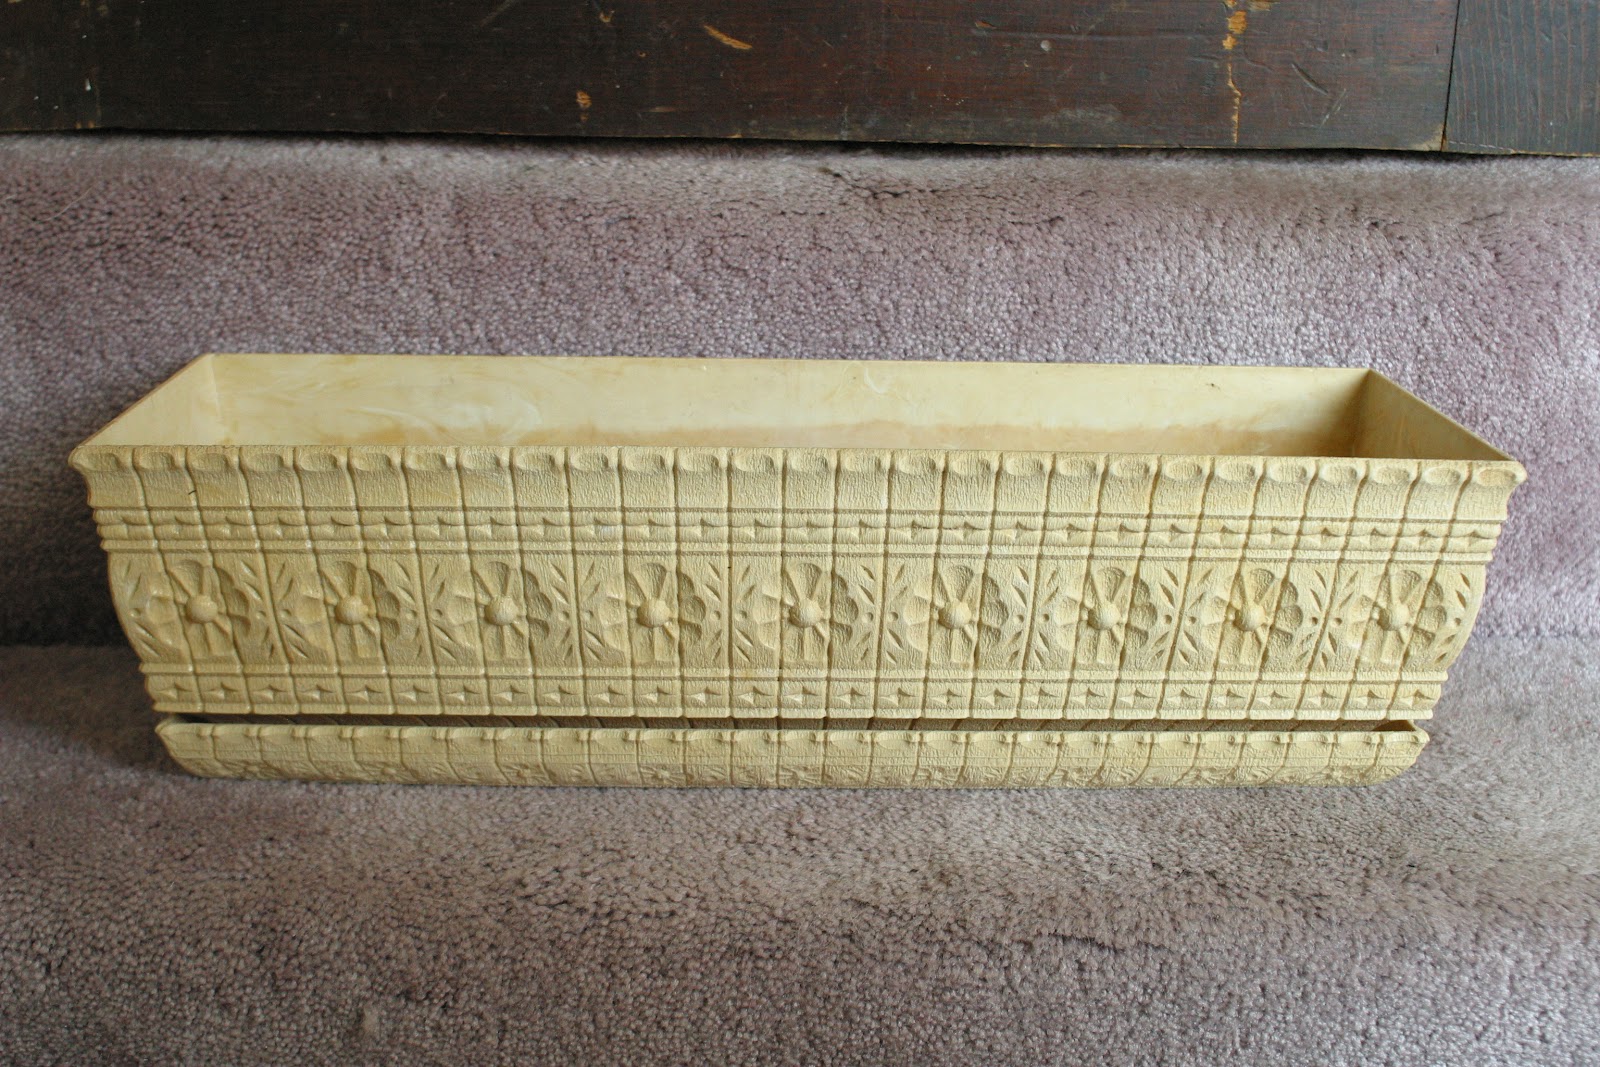
Of course, any good herb garden must have a lovely little planter to hold it. My mom had this old, slightly yellowed planter, with an interesting carved design. 


It actually wasn't too bad the way it was, but I figured I'd give it new life with (what else) paint! I found a can of red spray paint in the garage, washed my precious planter thoroughly, and away I went. 

First things first, setting up my spray station.

I used a garbage bag I found in the garage and several bricks and rocks, and laid them out in an unimportant part of our lawn (yes, we do have an abundance of dandelions).


Three bricks stacked on top of each other was enough to keep the main box of the planter up off the plastic when turned upside down, and one brick held up the drainage tray. This helped me to get at the top edges and kept the paint on the planter from sticking to the plastic.


Then the painting began.

I first sprayed the outside of each piece, using several layers to get into all the little crannies, and then the top of the tray. I also wanted to paint the inside of the main box - but not the whole thing, because my mom wasn't sure how the paint would affect the soil. So I used painters tape to create a rough border along the inside of the box, and mostly covered the rest of the inside with more painters tape and paper. 


(I had to relocate to the garage because of all the wind!)

A little spray paint on the exposed area will continue the red to the inside, and the dirt will cover up the rest. 

Give it a few hours to dry, and....VIOLA! 


A snazzy new planter for some de-lishus future herbs.

I also made this nifty bracelet yesterday!


Thank you Pinterest!

Let me know what you think below :) Danke!

Read More......

Pin It!

Tuesday, March 27, 2012

Failed Bubbles and Paint Colors

Hello e'rybody! It's been 8 days since my last post, and unfortunately I haven't done anything too creative or crafty in that time...but I shall update nonetheless. 

Anyone seen this on Pinterest?


Apparently, the contents of a glow stick plus bubble solution equals some glowy neon bubbles (and a slightly disturbing, pink-eyed man). Well, Saturday night, my boyfriend, Caleb, and I went to Dollar General and picked up some $1 bubbles so we could give this a try. "Miracle Bubbles", they were called. 

Using scissors and Caleb's muscles, we cut open a glow stick inside a glass measuring cup. It took several squeezes with the scissors, but we finally cut through the plastic outer tube and inner glass tube, and then poured the glowing juice into our 2 ounce bottle of bubble solution. Time to go outside!

Unfortunately, when we went outside to blow our miraculous bubbles, we were not surrounded by spheres of luminosity. Actually, the bubbles were barely visible. If you looked closely, they seemed to have a bit of a glow, but they weren't quite as magical as we had hoped. This may have been because we didn't have enough glow sticks: chemistry.about.com's tutorial on making glowing bubbles (check it out here) says you should start with equal parts bubble solution and glow stick liquid. I'm pretty sure the liquid in a glow stick is less than 2 ounces, and since we poured it into the whole 2 ounce bottle of bubble solution, we probably should've used two or three glow sticks. So that may have been the problem! Sadly, we only had one glowstick. But hey, the mixture turned out to be great sidewalk paint!

Also, yesterday I went to my new place to test out some paint colors! Did I tell anyone I'm moving out in May? Woohoo! Hopefully I'll be able to post some pictures of my room soon (it is actually just a room, I'm going to be living in someone's house), but for now, here are the paint colors I'm considering. 


The pink is possibly for the walls...the brown is for inside the closets. I think they will go smashingly with the yellow-green carpet :)

I would love to hear feedback! Comment below with any questions or tips :) Thank ya! 

Carey


Read More......

Pin It!